Who can do this
Section titled “Who can do this”- Company Owners and Company Admins can import and export clients and contacts.
- Company Members can import clients if client management is not restricted in company settings.
Preparing your Excel file
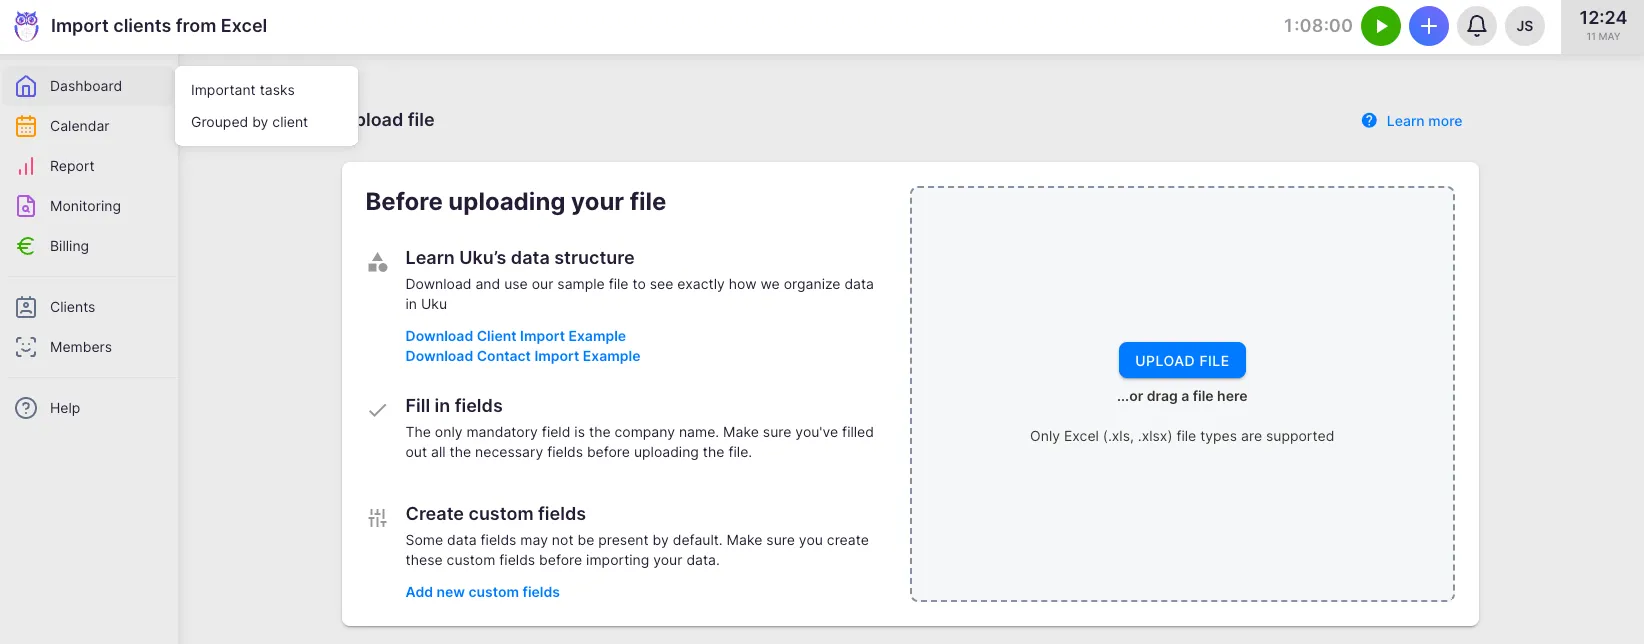
Section titled “Preparing your Excel file”Before uploading, download the sample file to see exactly how Uku expects your data:
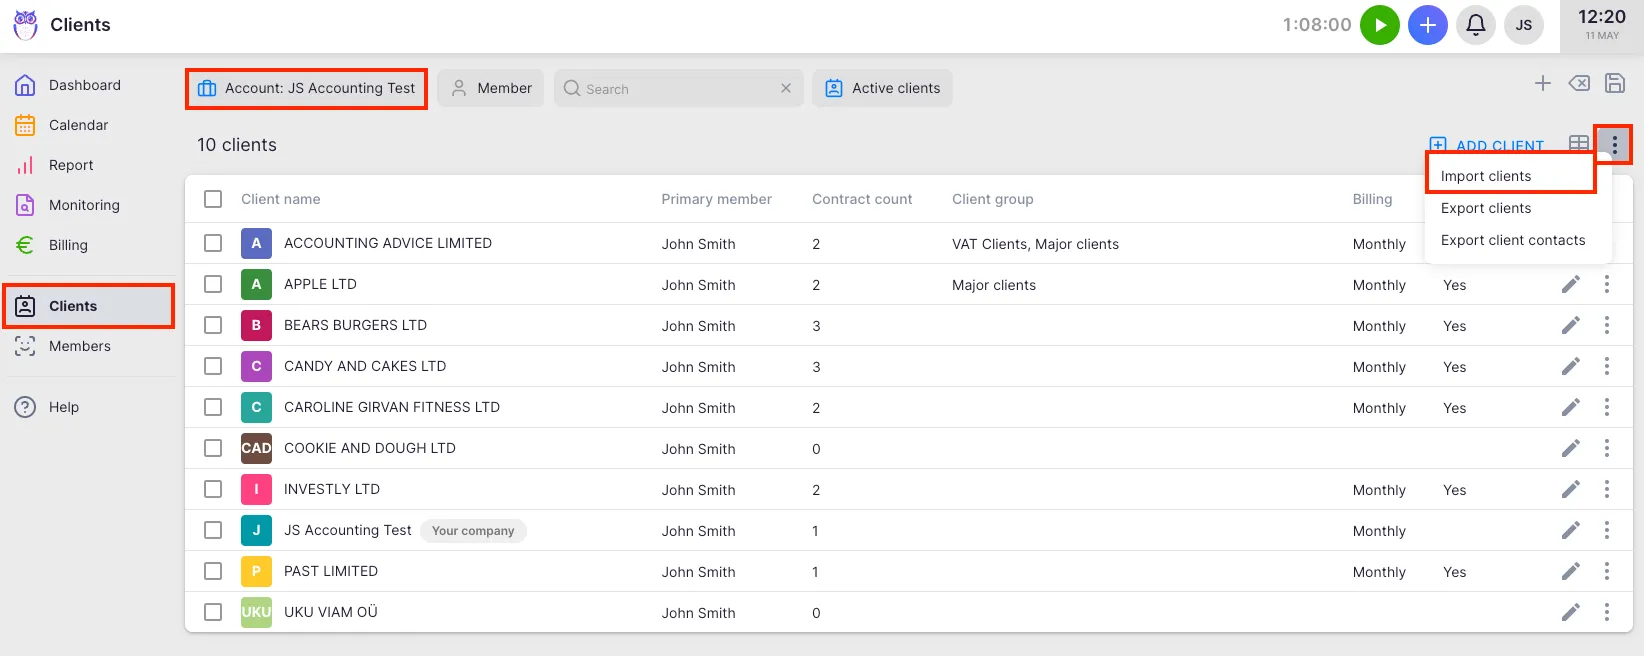
- Go to Clients in the main navigation.
- Open the action menu (three-dot menu at the top-right of the client list) and select Import clients.
- On the method selection page, click Excel (XLS, XLSX).
- On the upload page, click Download Client Import Example to get a pre-formatted template. For contacts, click Download Contact Import Example.
File requirements:
- Format: .xls or .xlsx (Excel).
- Only the client name (company name) is mandatory. All other fields are optional.
- Include the registration code (company number) if you want to update existing clients by matching.
- One row per client. Contact details can be included as additional columns in the same file.
- If your data includes fields not in the default field set, create those custom fields first — either from Settings & Apps or directly from the mapping screen during import.

Step 1 — Upload
Section titled “Step 1 — Upload”On the upload page, drag your file into the drop zone or click to browse. Uku accepts both .xls and .xlsx formats. The file uploads immediately and moves to the mapping step.
Step 2 — Map columns
Section titled “Step 2 — Map columns”The mapping screen shows your spreadsheet with column letters (A, B, C…) across the top. For each column, select the matching Uku field from the dropdown.
- Auto-matching — Uku tries to match columns by reading your header names. If headers match Uku field names (e.g. “Name”, “Email”), the mapping pre-fills automatically.
- First row is a header — toggle on if your first row contains column names rather than data. Enabled by default.
- Add client group — create a new client group on the fly directly from the mapping screen.
- Add client custom field — create a custom field on the fly if your data includes fields not yet in Uku.
- Static values — use these options to assign the same client group, responsible member, or custom field value to every imported client.
When mapping is complete, click Next.
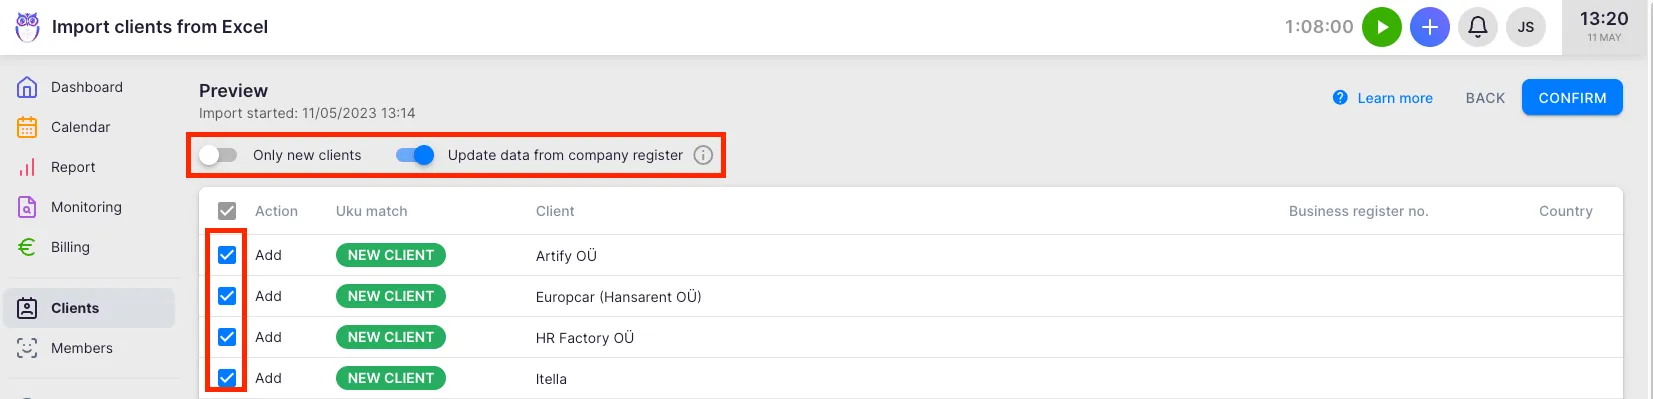
Step 3 — Preview and validate
Section titled “Step 3 — Preview and validate”The preview screen shows every row from your file with its import status:
- New clients — rows that will create new client records.
- Existing clients — rows matched to existing clients by registration code, which will be updated.
Use the filter dropdown to view All, New clients, or Existing clients only. Search by name or company number to find specific rows. Use the checkboxes to select or deselect individual rows — only selected rows are imported.
The Update data from company register toggle (available in Estonia, UK, and other supported countries) enriches client data from the local business register during import.
Click Confirm to start the import.
Step 4 — Track progress and review results
Section titled “Step 4 — Track progress and review results”A progress bar shows how many records have been processed. The import runs in the background — you can continue working in Uku. When the import finishes, an in-app notification appears and a results dialog opens showing:
- Added — new clients created.
- Updated — existing clients matched and updated.
- Skipped — rows that were deselected or intentionally excluded.
- Failed — rows that could not be imported due to data errors (Excel imports only).
After the import, Uku automatically filters the client list to show only the newly imported clients. Remove the “Last import” filter to see all clients again.
Downloading and correcting failed records
Section titled “Downloading and correcting failed records”If any rows failed, the results dialog shows the count and a Download report button. Click it to download failed_to_import.xlsx. This file contains only the failed rows with their original data. Correct the data errors, then upload the corrected file as a new import.
The download link also remains on the main import page for reference.
Importing contacts
Section titled “Importing contacts”Contacts (people associated with a client) can be imported in the same Excel file as clients, or separately:
- Download the Contact Import Example template for the expected contact column format.
- Contact columns (name, email, phone) are labeled with “Contact” in the column mapping dropdowns.
- When importing contacts together with clients, map both client and contact columns in the same file. Each row creates or updates one client and attaches the contact to it.
Updating existing clients via import
Section titled “Updating existing clients via import”Re-importing a file updates existing clients rather than creating duplicates, as long as you include the registration code:
- Include the registration code column in your file and map it to Registration code.
- Rows where the code matches an existing Uku client appear as Existing clients in the preview.
- Select those rows and confirm — their data is updated with your file’s values.
If no registration code is present, every row is treated as a new client.
Custom field value formats
Section titled “Custom field value formats”When you map a column to a custom field, format the values in your file to match the custom field’s type. Custom fields must already exist in Uku before import — or you can create them on the fly from the Add client custom field option in the column mapping screen.
| Custom field type | Value to enter | Updatable via re-import |
|---|---|---|
| Text | Free text | Yes |
| Integer | Whole number | Yes |
| Number | Decimal number | Yes |
| Choice | Existing option name (must match exactly) | Yes |
| Multiple choice | Comma-separated list of option names (e.g. Xero, QuickBooks) | Yes |
| Date | dd.mm.yyyy format | Yes |
| Yes/No | 1, yes, or true for Yes; 0, no, or false for No | Yes |
Importing from accounting software
Section titled “Importing from accounting software”In addition to Excel, Uku can import clients directly from connected accounting integrations. On the import method selection page, available integration tiles appear alongside the Excel option. Supported integrations include QuickBooks, Xero, e-conomic, Merit Aktiva, SmartAccounts, Scoro, Tripletex, Fortnox, FreeAgent, and Directo. The integrations shown depend on your region and plan.
Exporting clients
Section titled “Exporting clients”- Go to Clients in the main navigation.
- Apply any filters you need (the export respects all active filters).
- Open the action menu and select Export clients.
- The CSV file downloads immediately.
Exporting contacts
Section titled “Exporting contacts”- Go to Clients in the main navigation.
- Apply filters as needed.
- Open the action menu and select Export client contacts.
- The CSV file downloads immediately.
If you are on the Contacts tab of the client list, the option is labeled Export contacts instead.
Troubleshooting
Section titled “Troubleshooting”My column headers are not auto-mapping correctly
Section titled “My column headers are not auto-mapping correctly”Auto-matching reads your header names and compares them to the field names in Uku. If your headers use different wording (e.g. “Company” instead of “Name”, or “Tax ID” instead of “VAT number”), the auto-match will not fire. Map those columns manually using the dropdown for each column on the mapping screen.
Imported clients are appearing as new instead of updating existing ones
Section titled “Imported clients are appearing as new instead of updating existing ones”The importer matches existing clients by Client code and/or Registration code — at least one must be present in your file and mapped on the import screen. Client code is checked first, then Registration code. If neither column is included, or the codes do not match exactly what is stored in Uku, every row is treated as new. Include and map the Client code and/or Registration code column to enable update matching.
The import shows 0 failed records but some clients are missing
Section titled “The import shows 0 failed records but some clients are missing”Records can be skipped (not failed) if they were deselected in the preview step or if a row had no client name (the only required field). Check the Skipped count in the results dialog. Return to the import page and re-import those rows after ensuring the name field is filled.
The Export clients option is greyed out or missing
Section titled “The Export clients option is greyed out or missing”Export requires Company Owner or Company Admin rights. If the option is not visible, your role does not include export permissions. Contact your Company Admin.