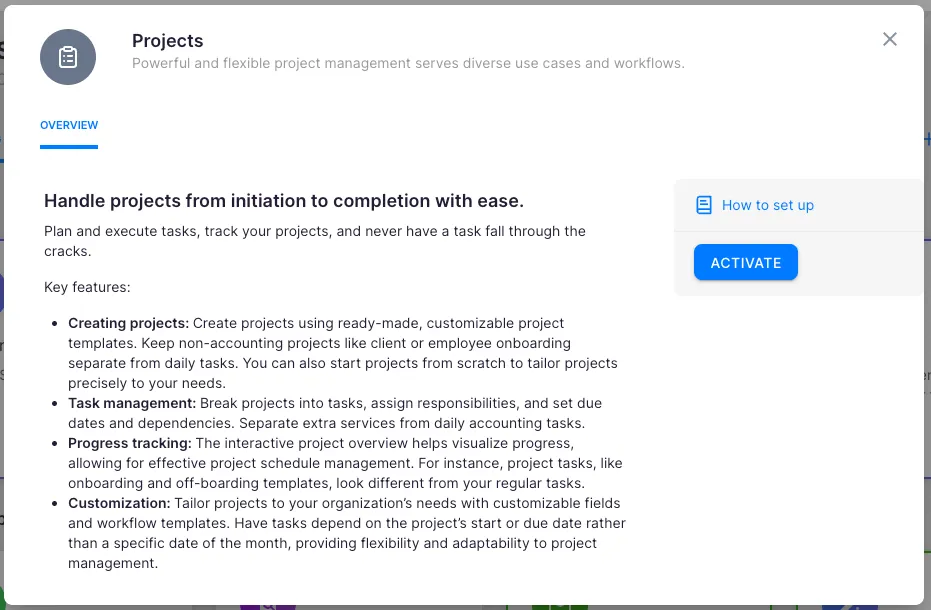
The Projects app enables project-based work management alongside the standard client workflow. Activate it to track finite engagements — tax return projects, audit engagements, one-off assignments — with their own statuses, phases, and task templates.
Who can do this
Section titled “Who can do this”- Company Admins and Company Owners can activate the Projects app, configure all settings, and manage workflow templates.
- Regular members can add and change workflow templates only if granted permission under the app’s rights settings.
Activate the Projects app
Section titled “Activate the Projects app”- Select Settings & Apps from the main navigation.
- Open the Projects app.
- Click Activate.
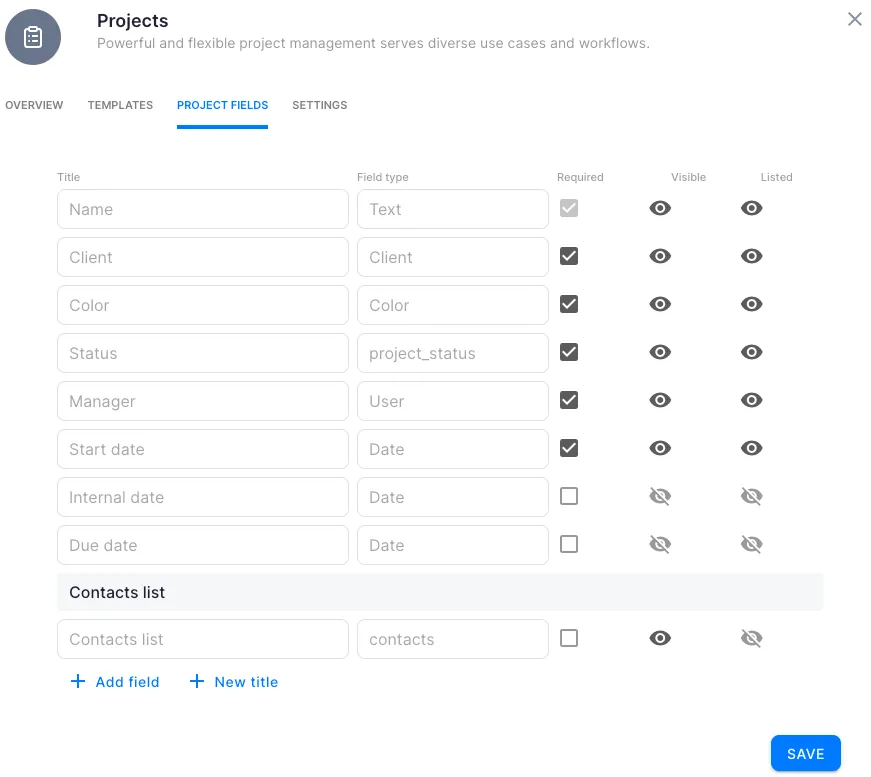
Set up project fields
Section titled “Set up project fields”When you activate the app, a set of default fields is created automatically. The Name field is always mandatory. For all other fields, you can choose whether they are:
- Mandatory when adding a project
- Shown when adding a project (visible but not required)
- In list — displayed in the projects overview list
Add a new project field
Section titled “Add a new project field”- Click + Add new field.
- Choose the input type:
- Yes/No — checkbox field
- User — single selection from active members
- Date — calendar date
- Multiple users — multiple selections from active members
- Multiple choices — predefined options, multiple selectable
- Number — number with decimal places
- Long text — up to 1,000 characters
- Text — up to 100 characters
- Integer — whole number
- Choice — predefined options, single selection
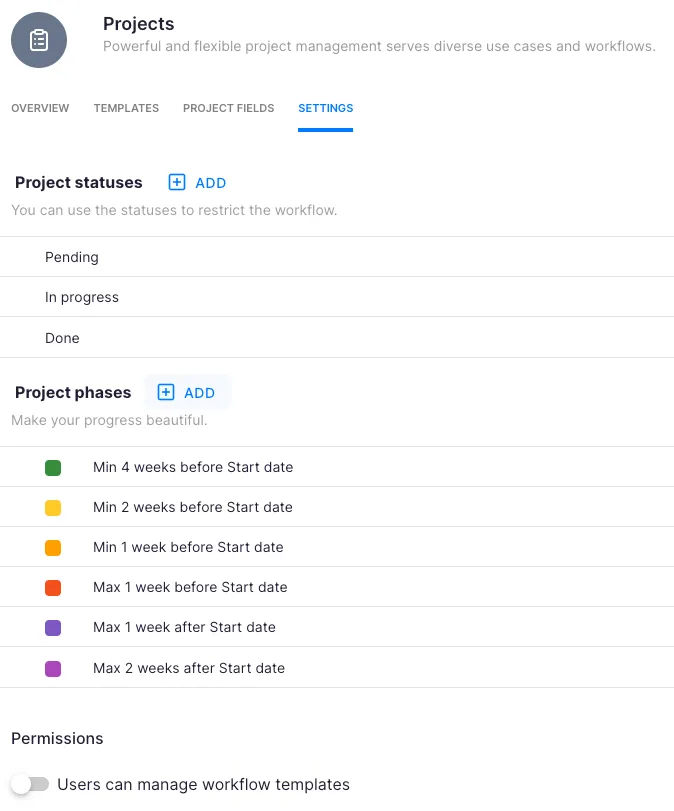
Configure project statuses
Section titled “Configure project statuses”Three default statuses are created on activation: Pending, In progress, and Done. Add new statuses or modify existing ones to match your workflow. See the How to use project statuses article for full details on using statuses to control which tasks appear on the Dashboard.
Configure project phases
Section titled “Configure project phases”Project phases let you control when tasks appear relative to the project timeline. For example, you can set a task to appear 2 days before the project start date, highlighting it on the Dashboard to indicate it needs attention. Tasks are distinguished by a color indicator and a project label on the Dashboard and client card.
Set member permissions
Section titled “Set member permissions”Under the Rights section of the Projects app settings, choose whether regular members can add and change workflow templates. By default, only Company Admins and Owners can manage templates.


Troubleshooting
Section titled “Troubleshooting”Project fields are not appearing when I add a project
Section titled “Project fields are not appearing when I add a project”Check the field settings in the Projects app configuration. Ensure the field is set to be shown when adding a project. Fields that are neither mandatory nor set to show will not appear in the project creation form.
Tasks are not showing on the Dashboard for a project
Section titled “Tasks are not showing on the Dashboard for a project”Verify the Required project status for each task in the workflow template. Tasks only appear on the Dashboard when the project’s current status matches the task’s required status.
A member cannot create workflow templates
Section titled “A member cannot create workflow templates”Check the Rights section in the Projects app settings. By default, only Company Admins and Owners can add and change workflow templates. Enable the permission for regular members if needed.
Date-dependent tasks are not shifting when project dates change
Section titled “Date-dependent tasks are not shifting when project dates change”Make sure the tasks are linked to a Date type project field in the workflow template. If the task’s time dependency is not configured, it will not automatically adjust when project dates change.