Project workflow templates define the tasks, assignees, required statuses, and date dependencies for a project type. Creating company-specific templates ensures consistency and completeness across all projects of the same type — for example, a tax return template that covers every step from data collection to filing.
Who can do this
Section titled “Who can do this”- Company Admins and Company Owners can create and edit workflow templates by default.
- Regular members can also create templates if enabled in the Projects app settings under Rights.
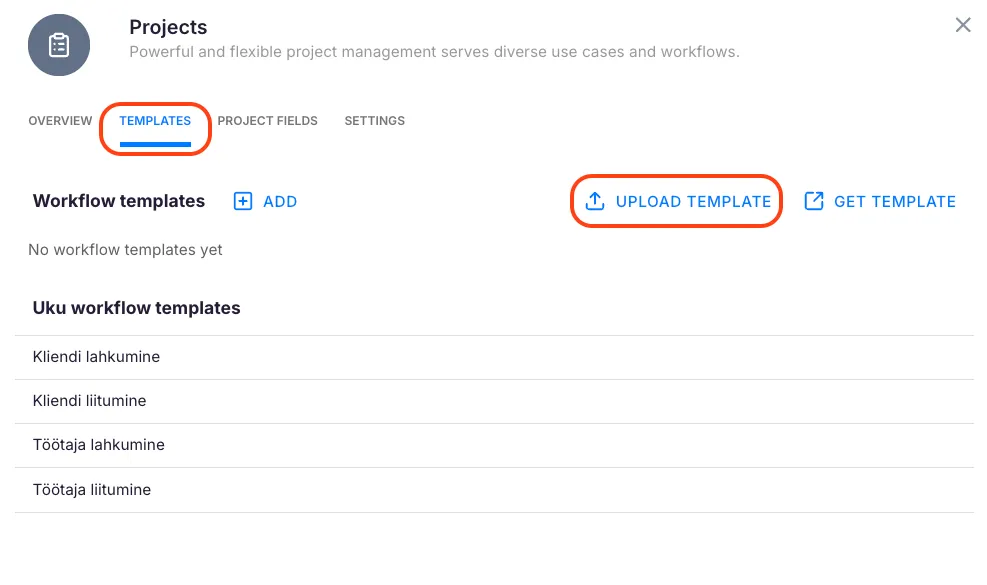
Option A: Upload a workflow template from Excel
Section titled “Option A: Upload a workflow template from Excel”- Navigate to Settings & Apps → Projects → Templates.
- Click Upload template.
- Drag and drop the Excel file or select it from your computer.
- Once uploaded, the template appears in your list with the upload date and time.
Click the three-dot menu next to any template to rename, duplicate, or delete it.


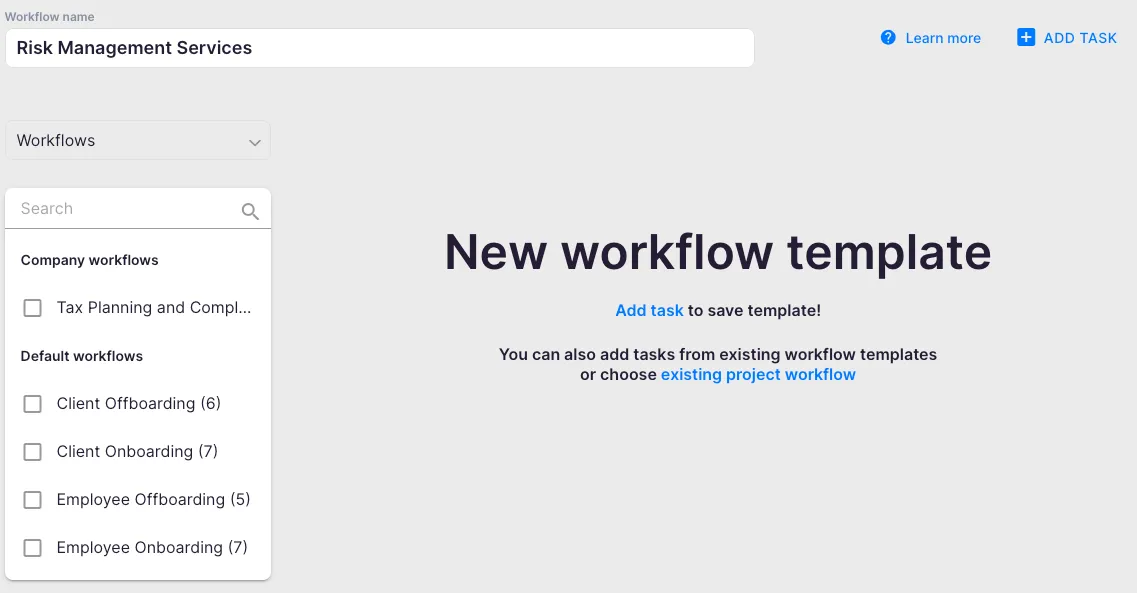
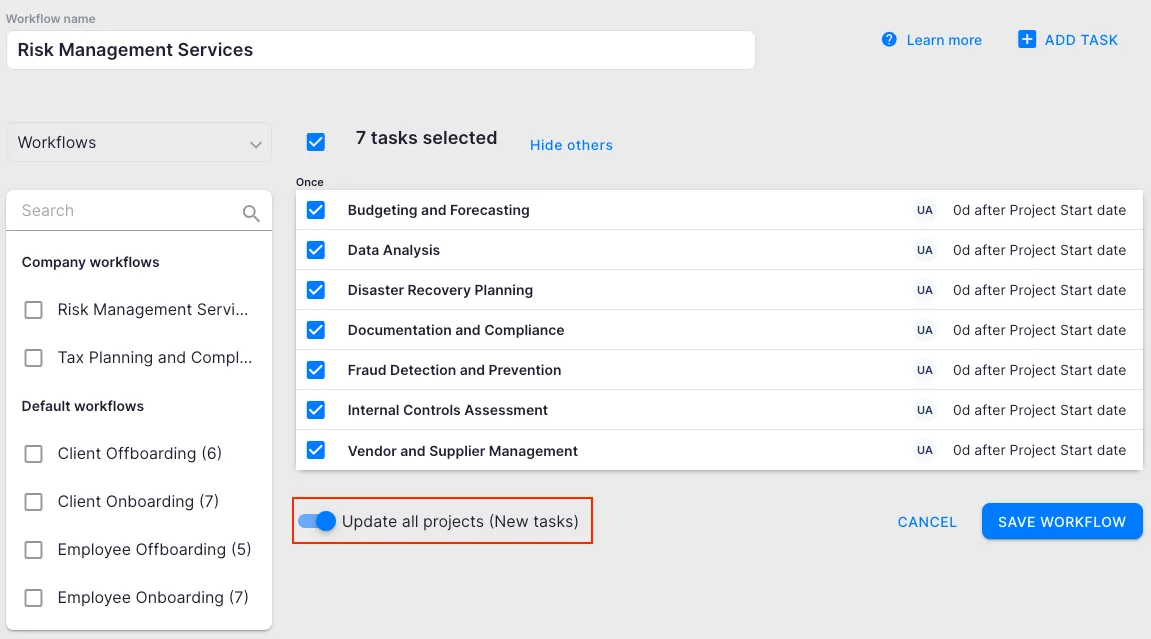
Option B: Create the template manually
Section titled “Option B: Create the template manually”- Open the Templates tab in Settings & Apps → Projects.
- Click + Add to create a new workflow template.
- Give the template a descriptive name.
- Choose whether to base it on an existing template or start from scratch.
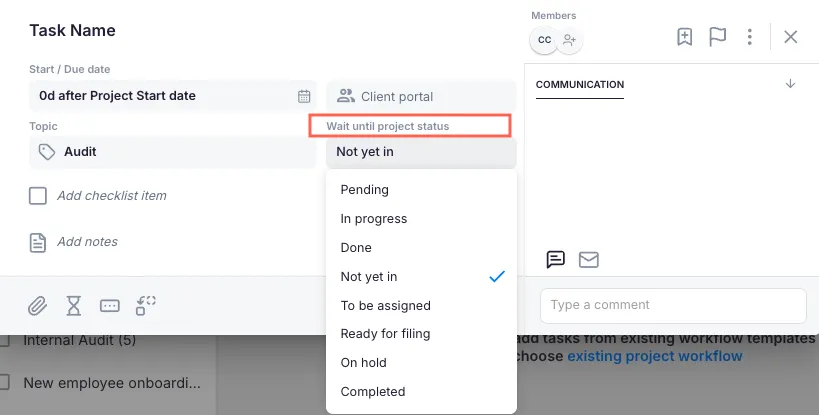
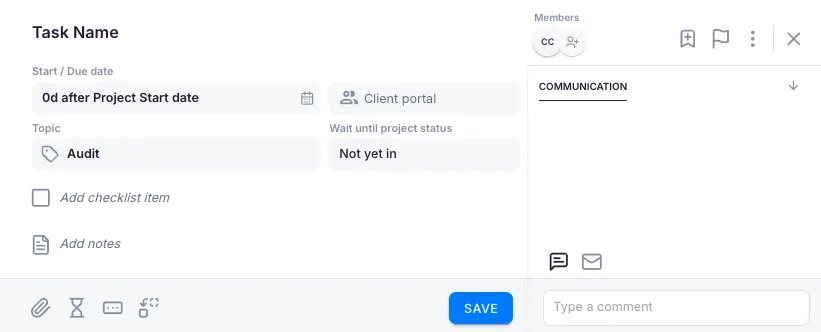
- For each task, define:
- Task title — the name of the task
- User — assign to a member, group, or member role
- Required project status — defines what project status the project must have for the task to appear on the Dashboard
- Start/Due Date — choose which project date value the task relates to
- Save the template.
You can also add dependencies between tasks in the template. See the Using task dependencies article for details.

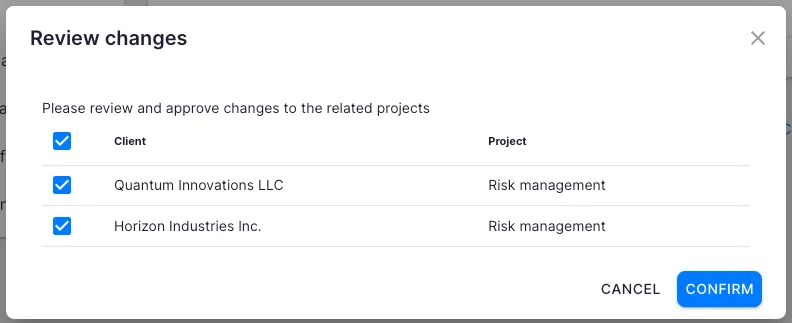
How template updates work
Section titled “How template updates work”When you save changes to a workflow template, Uku displays all active projects that use that template. By default, changes apply to all active projects (excluding archived ones). Remove any project from the list if you do not want the update to apply to it.
Troubleshooting
Section titled “Troubleshooting”Tasks from the template are not appearing on dashboards
Section titled “Tasks from the template are not appearing on dashboards”Check the Required project status setting on each task. Tasks only appear when the project reaches the specified status. Update the project’s current status to make the relevant tasks visible.
The + Add button is not visible in the Templates tab
Section titled “The + Add button is not visible in the Templates tab”Your account may not have permission to create templates. Ask a Company Owner or Company Admin to enable template creation for regular members in Settings & Apps → Projects → Rights.
Excel upload fails or template appears empty
Section titled “Excel upload fails or template appears empty”Ensure the Excel file follows the correct format. Download a sample file from getuku.com and verify your columns match the expected structure.
Template changes did not apply to an existing project
Section titled “Template changes did not apply to an existing project”When saving template edits, verify the project was included in the update list. Archived projects are excluded from updates by default.