Tasks are the core unit of work in Uku. Create them manually with full details, use magic buttons for quick entry, or generate them from templates with pre-filled checklists and descriptions.
Who can do this
Section titled “Who can do this”- Any active member of a Uku company account can create tasks.
- Company Owners and Company Admins can configure company-wide task settings.
How to add a task
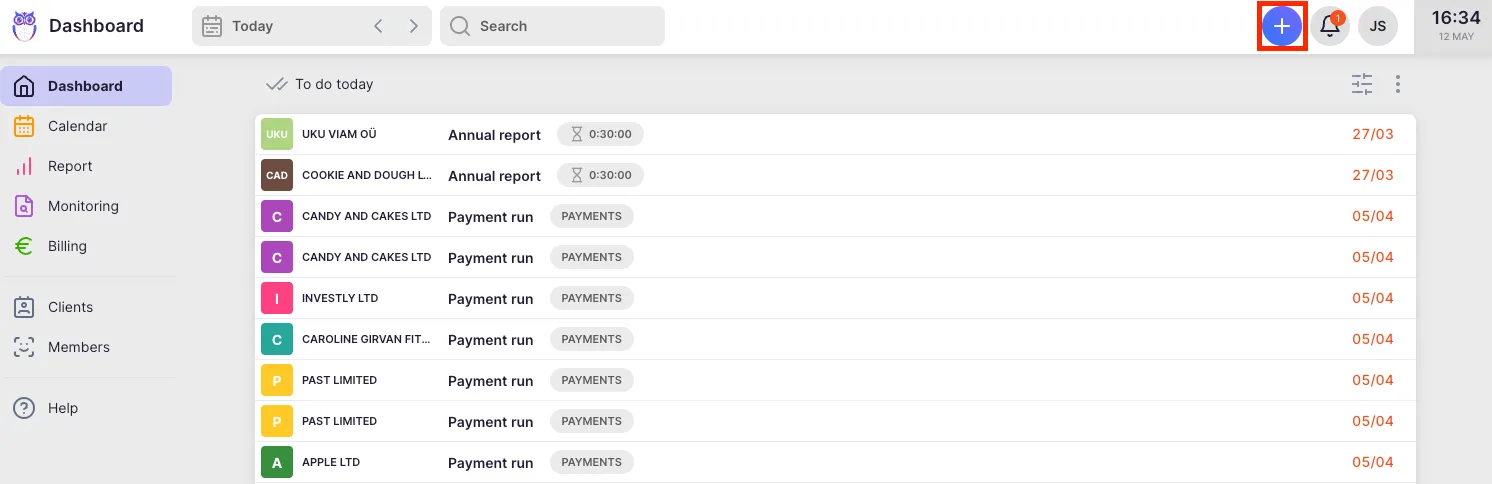
Section titled “How to add a task”- Click the + button in the header (available from any view in Uku).
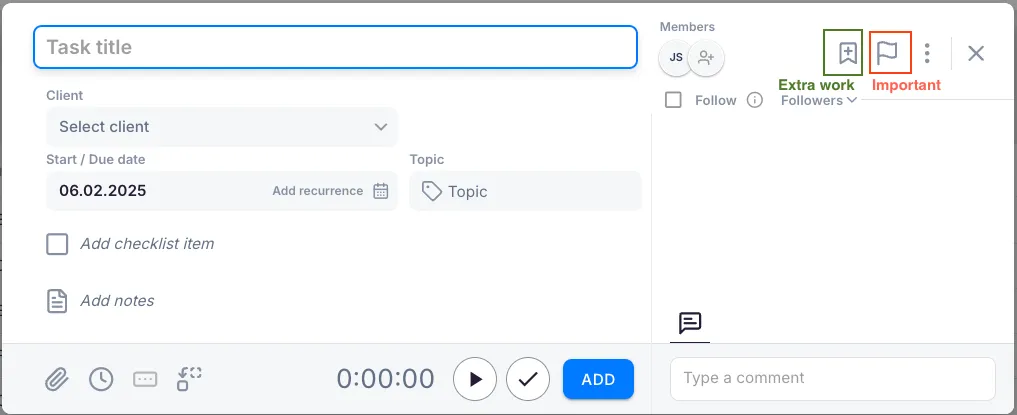
- Fill in the four required fields:
- Title — a brief, descriptive name that makes the task easy to find later.
- Client — the company or project the work relates to. You can select yourself as the client for personal assignments not visible to others.
- Member — one or more people doing the work. The system proposes the task creator by default.
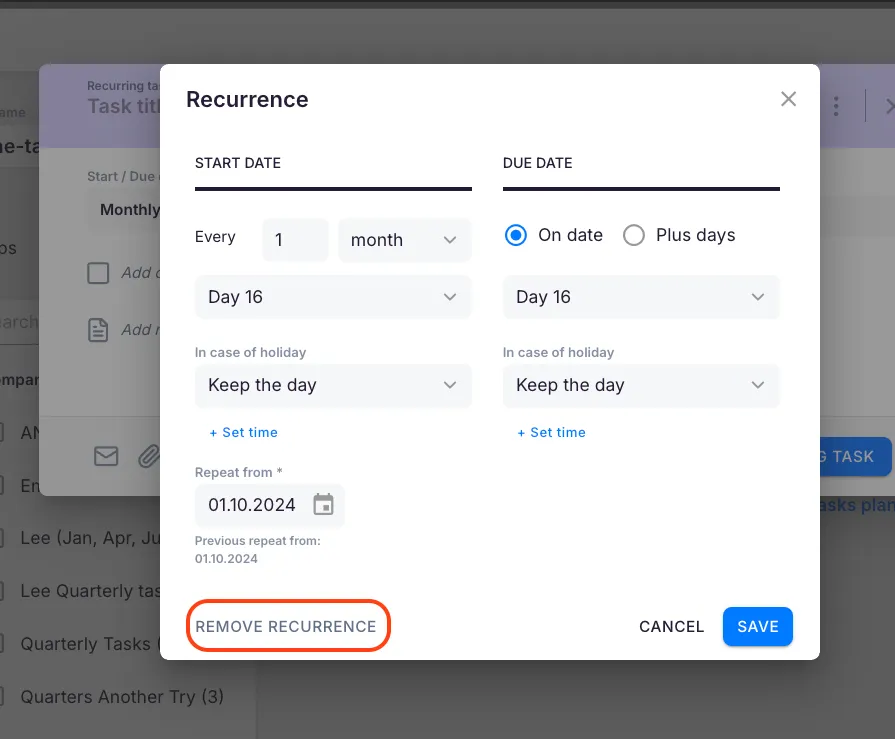
- Start/Due Date — the start date controls when the task appears in task lists. The due date is the completion deadline. If no due date is set, the start date doubles as the deadline. You can also assign a recurrence pattern here.
- Optionally mark the task as Extra work (click the bookmark-plus icon) or Important (click the flag icon).
- Click Add to save the task.
For fast, one-click entry of repeat tasks, use a magic button instead of the full form.
Optional fields
Section titled “Optional fields”- Topic — links the task to a specific area, letting you group tasks with different titles for easier filtering.
- Description — add extra context such as a client request or instructions for a substitute. Web addresses entered here are automatically converted into clickable links.
- Estimation — enter how long you expect the task to take. This helps with workload planning.
- Custom fields — access any custom fields added to your company account via the Custom fields button.
The task view — fields and actions
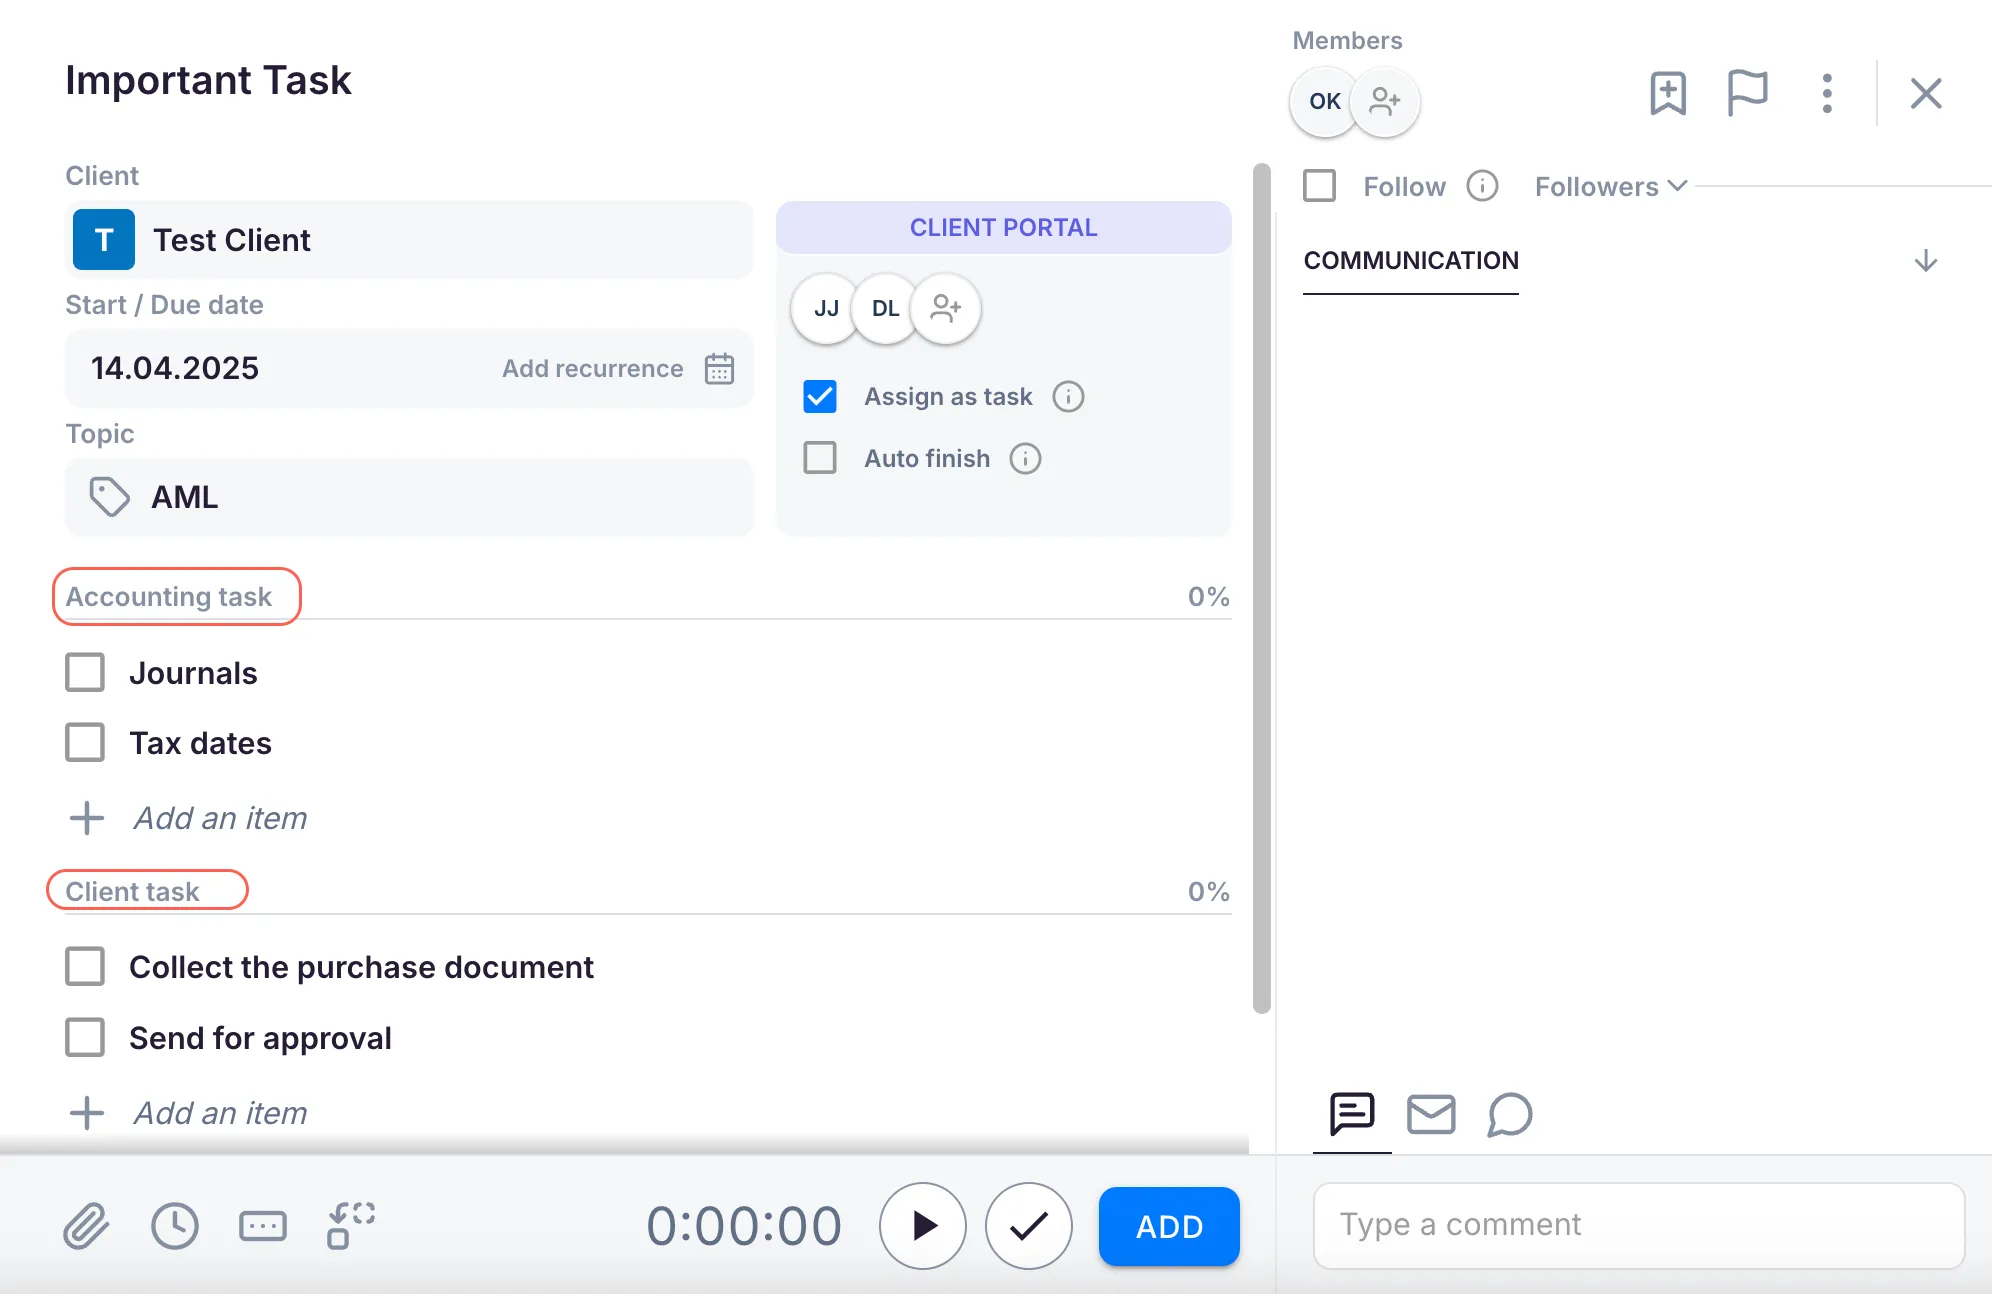
Section titled “The task view — fields and actions”After a task is created, open it to see the full task view. Key areas:
- Header — task title, client, topic, status chip, and the More menu (three dots) for advanced actions
- Sidebar fields — Assignees, Start date, Due date, Recurrence, Followers, Custom fields
- Time panel — click the time display to open the timesheet and add or edit time entries
- Description — rich text field for detailed notes and instructions
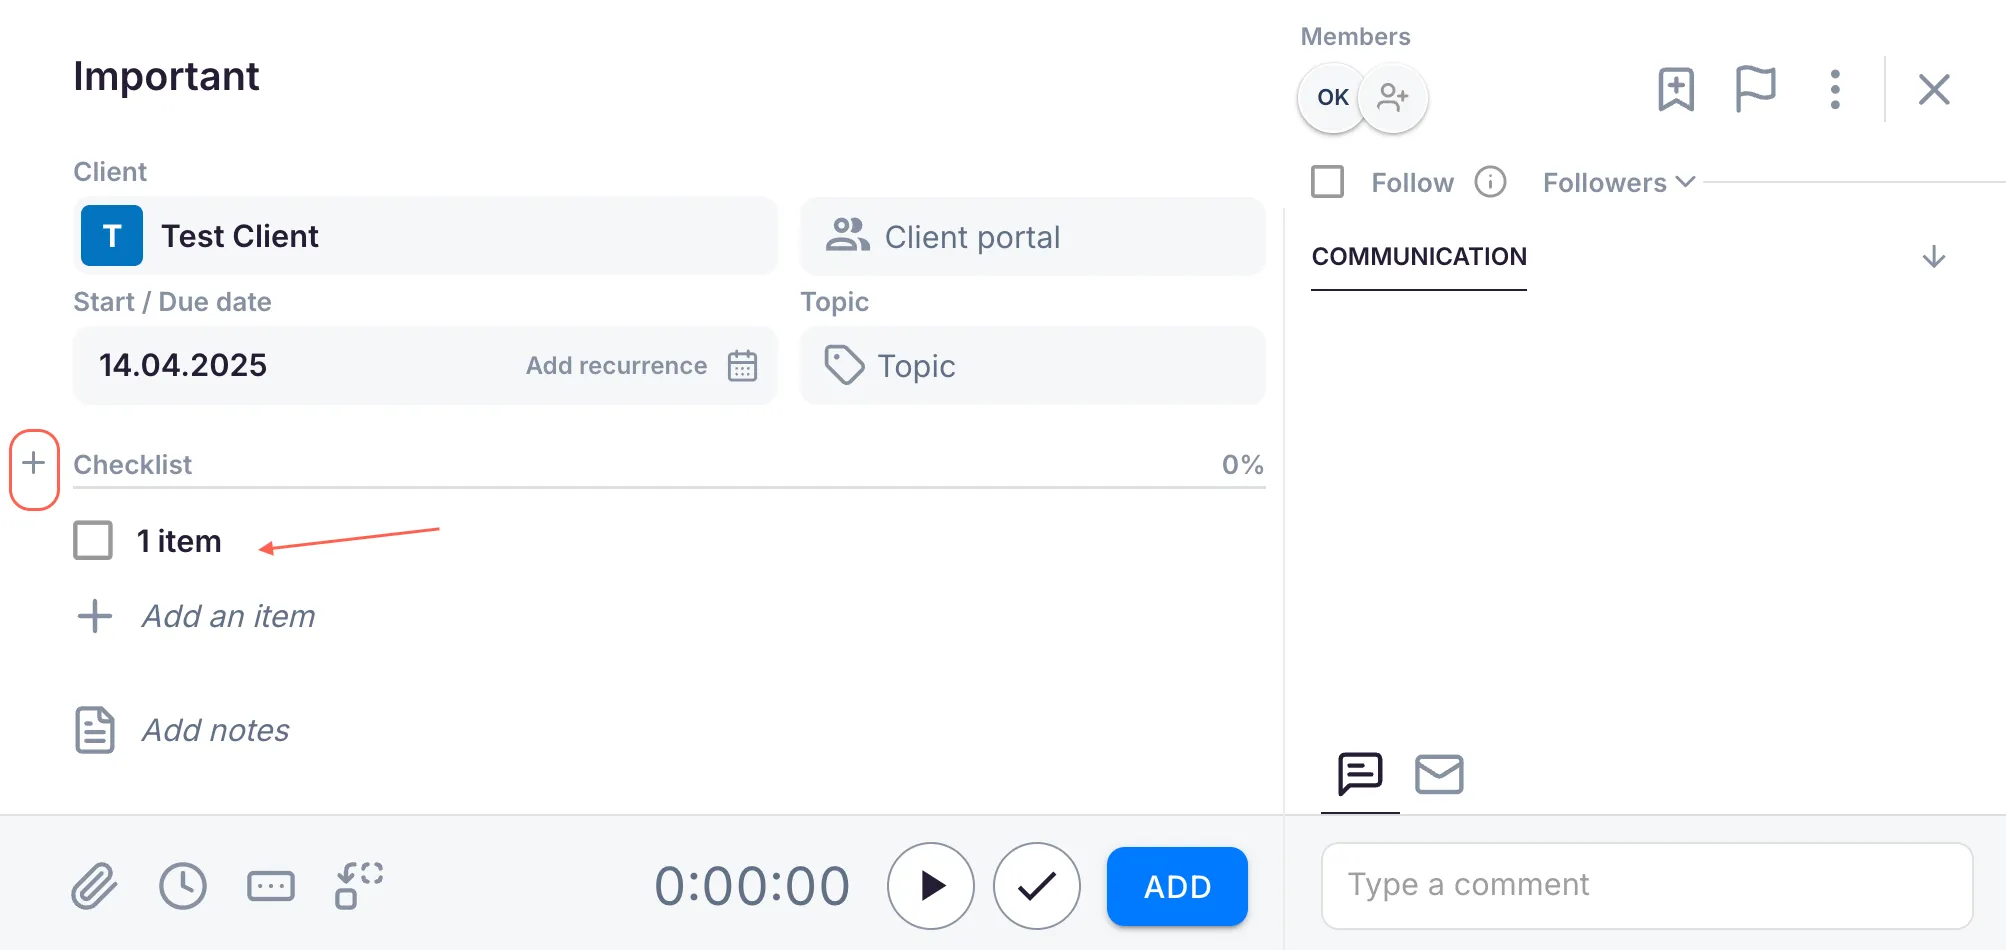
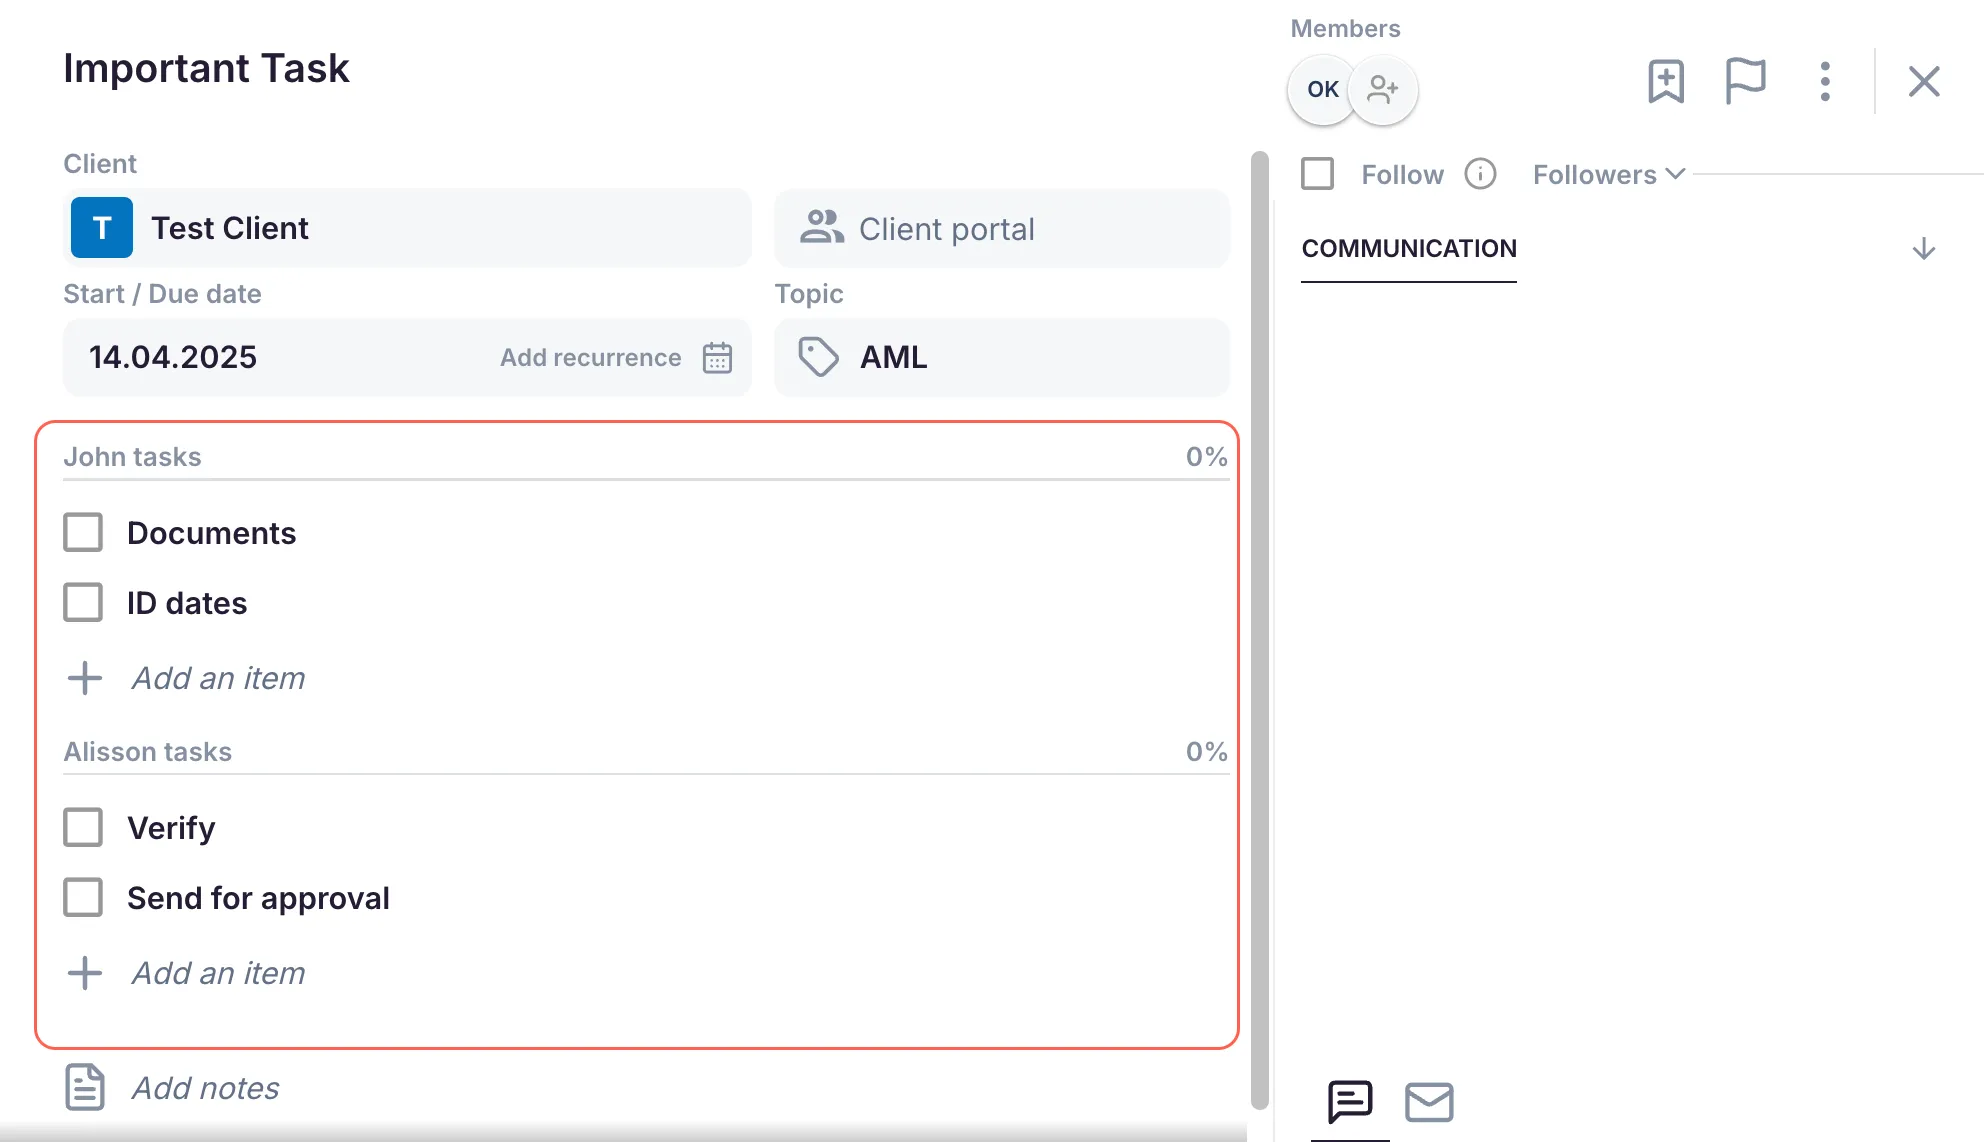
- Checklist — click Add checklist item to break the task into sub-steps
- Activity log — comments, mentions, status changes, and file attachments
How to edit a task
Section titled “How to edit a task”Open any task and click any field to edit it. Changes save automatically. You can edit the title, client, assignees, dates, topic, description, and custom fields at any time.
To change the task status:
- Click Mark done to complete the task.
- Click the status chip at the top to revert a done task to Active.
- Click Archive (in the More menu) to hide the task from active views without deleting it.

Creating a task from a template
Section titled “Creating a task from a template”Tasks from templates are designed for detailed one-off activities with a checklist or specific details (e.g., creating a report, performing a small audit).
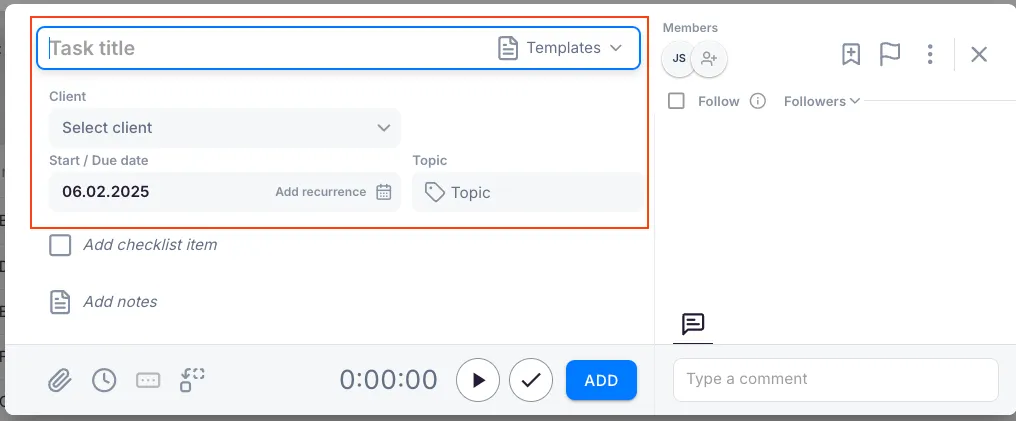
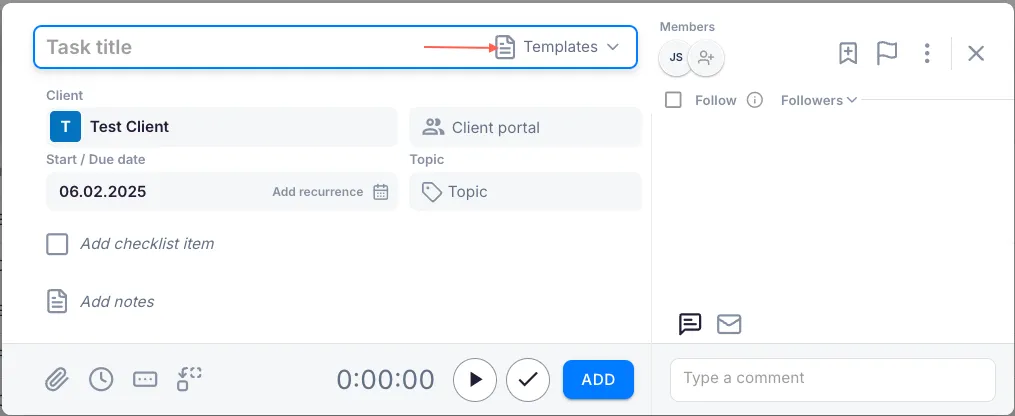
- Click the + button in the header.
- Next to the Title field, click Templates.
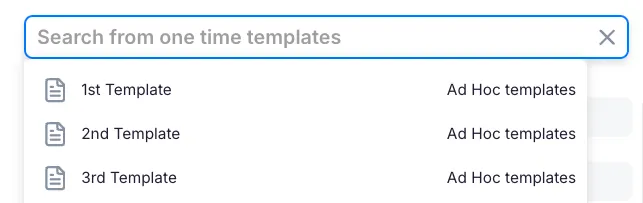
- Click inside the modal or start typing a title — a dropdown list of available templates will appear.
- Select a template. Task details will be pre-filled based on the master template.
- Choose the correct client for the task.
- Click Add to create the task.

Troubleshooting
Section titled “Troubleshooting”Cannot save the task — required fields are missing
Section titled “Cannot save the task — required fields are missing”Ensure all four mandatory fields (Title, Client, Member, Start/Due Date) are filled in before clicking Add.
Task does not appear on the dashboard
Section titled “Task does not appear on the dashboard”Check the start date. Tasks only appear on dashboards on or after their start date. If the start date is in the future, the task will not be visible yet.
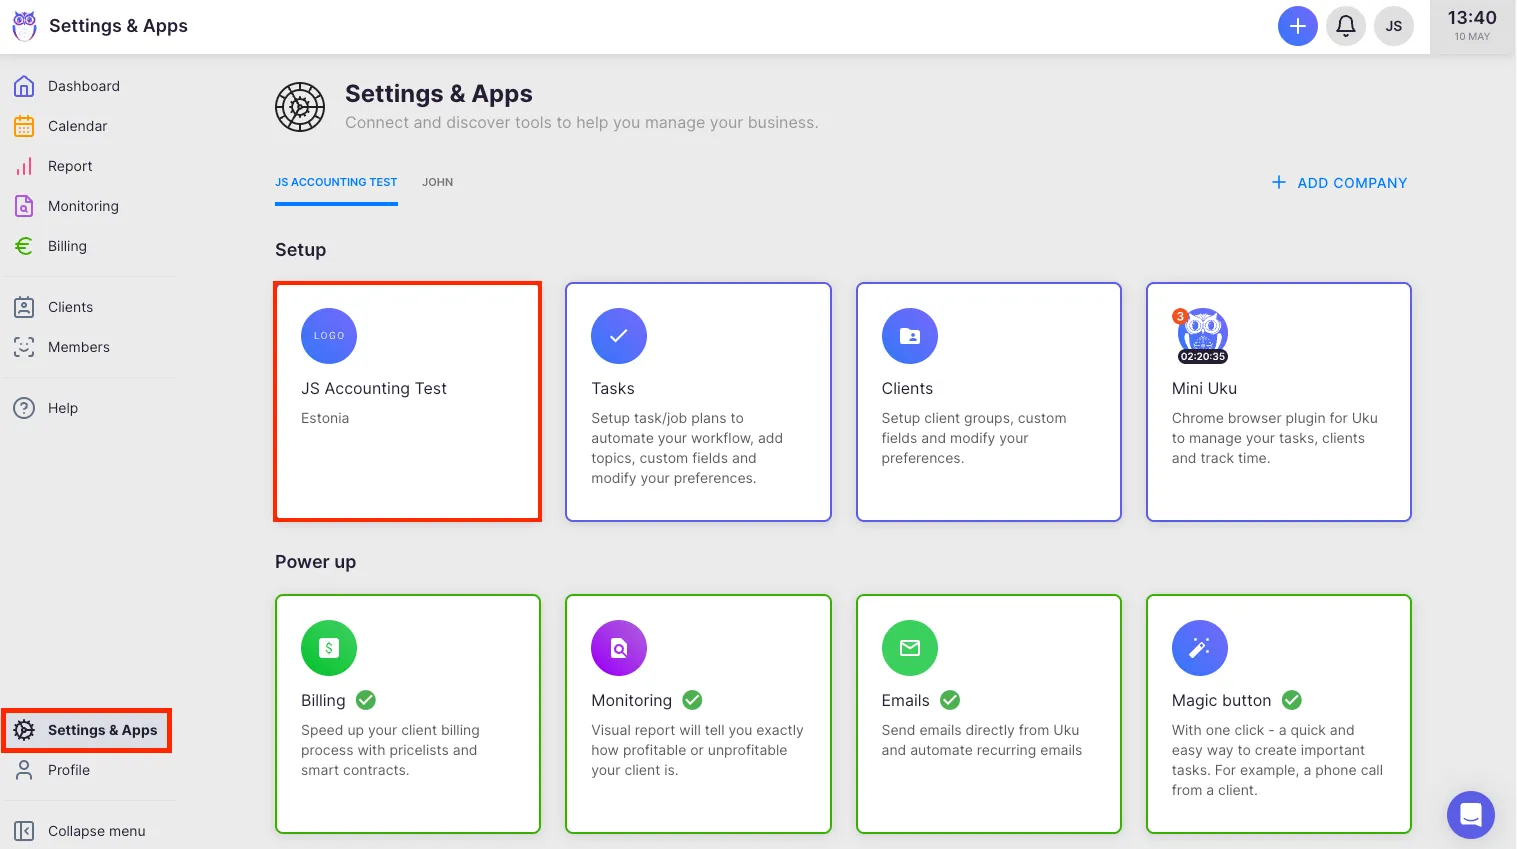
Template dropdown is empty
Section titled “Template dropdown is empty”Templates must be saved under Settings & Apps → Tasks → Templates before they appear in the task creation modal. Verify that templates exist in your company account.
Checklist items cannot be ticked
Section titled “Checklist items cannot be ticked”If the checklist appears locked, the task may need to be in an active state. Confirm that the task has not already been marked as done.