Who can do this
Section titled “Who can do this”- Company Owners and Company Admins can create, edit, archive, and delete client groups.
- All members can filter by client group in list views.
Creating client groups
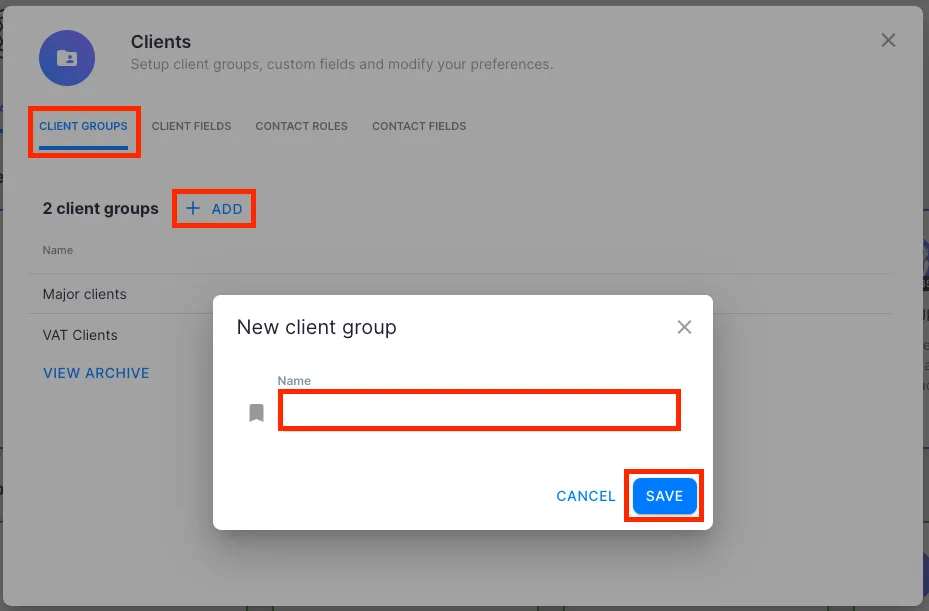
Section titled “Creating client groups”- Go to Settings & Apps in the main navigation.
- Select your company account and open the Client App.
- Go to the Client groups tab.
- Click the Add button (plus icon) in the table header.
- Enter a Name for the group and click Save.
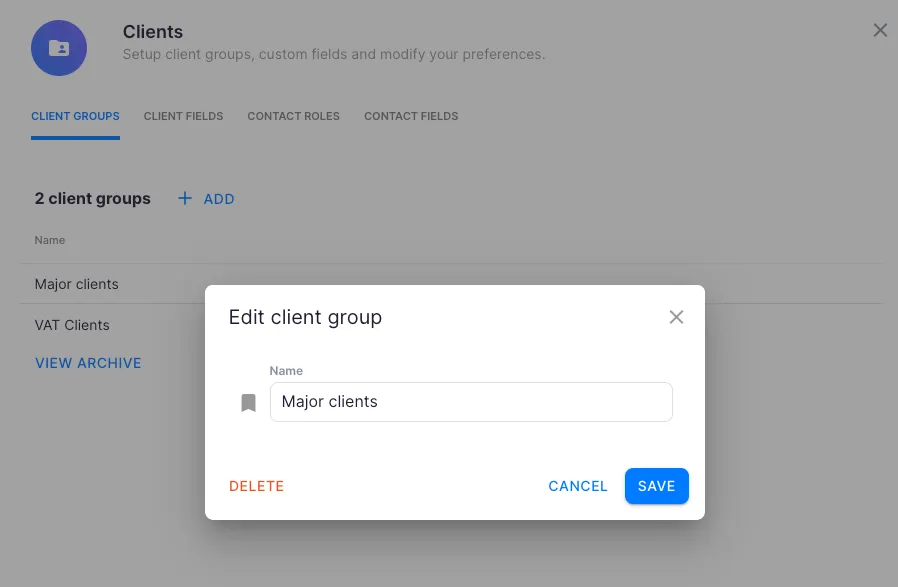
To edit a group, click its row in the list and update the name. To delete a group, open it for editing and click Delete. If the group is currently assigned to clients, Uku offers to archive it instead — archived groups are hidden from selectors but their historical data is preserved.
To restore archived groups, click View archive at the bottom of the client groups list, select the groups to restore, and confirm.
Assigning clients to groups
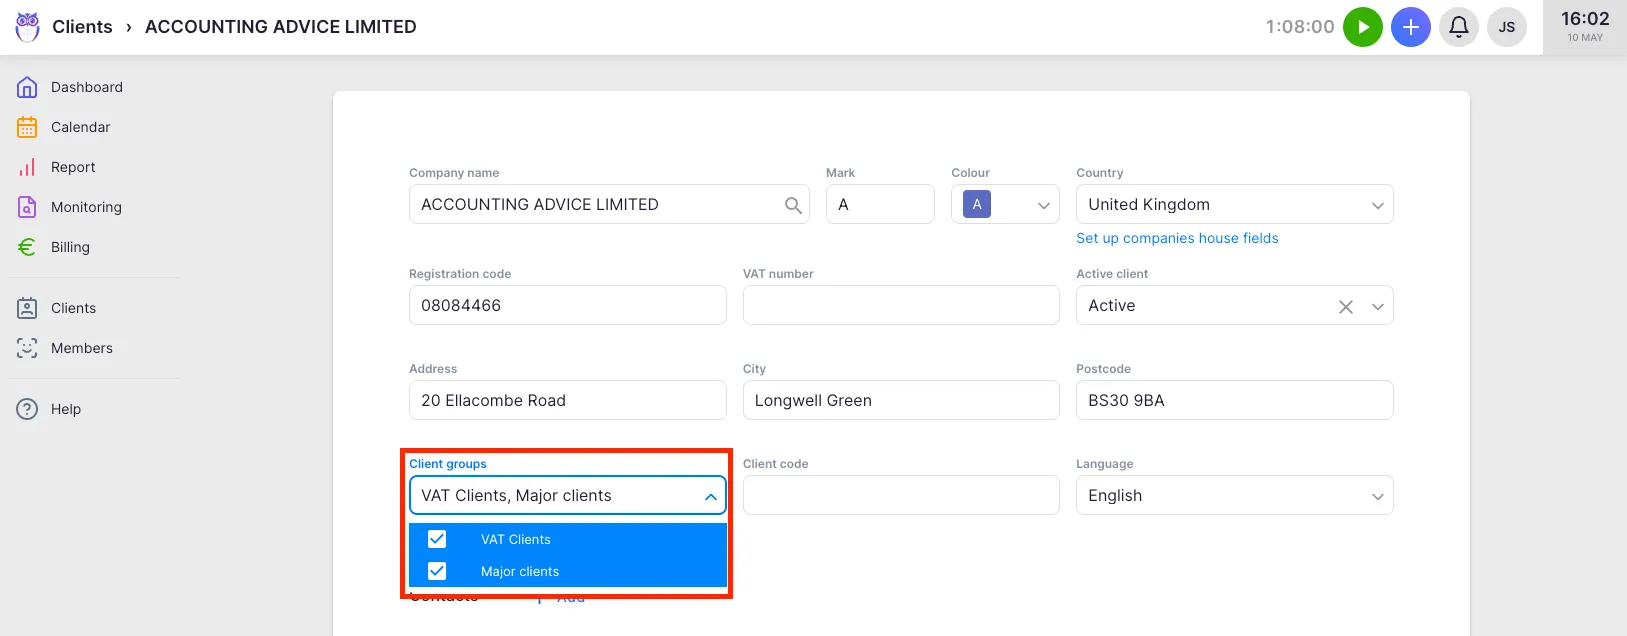
Section titled “Assigning clients to groups”When editing a client record, find the Client group field. It supports multi-select — choose one or more groups from the dropdown. The assignment takes effect immediately after saving the client.
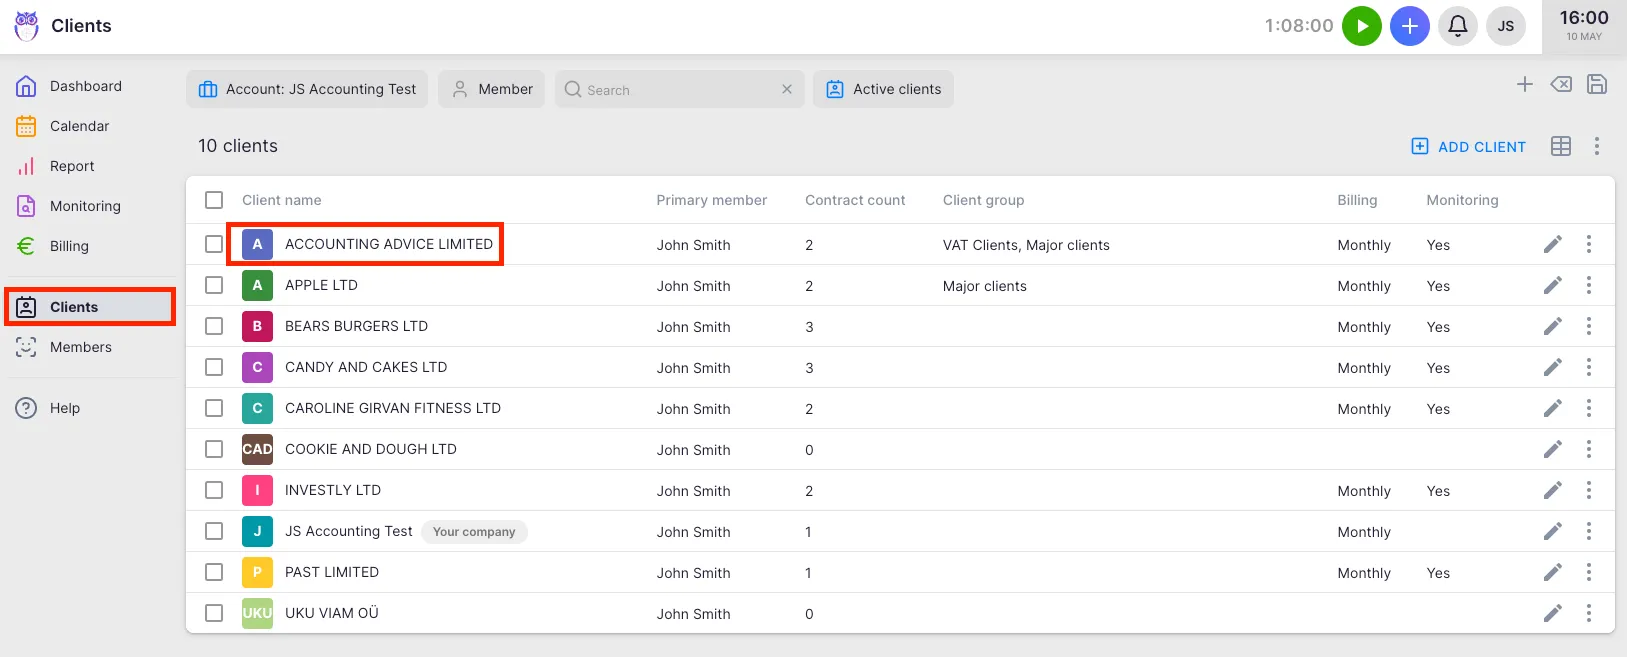
In the client list, the Client group column shows all groups assigned to each client. You can also assign groups during bulk import by mapping an Excel column to the client group field.
Filtering by client group
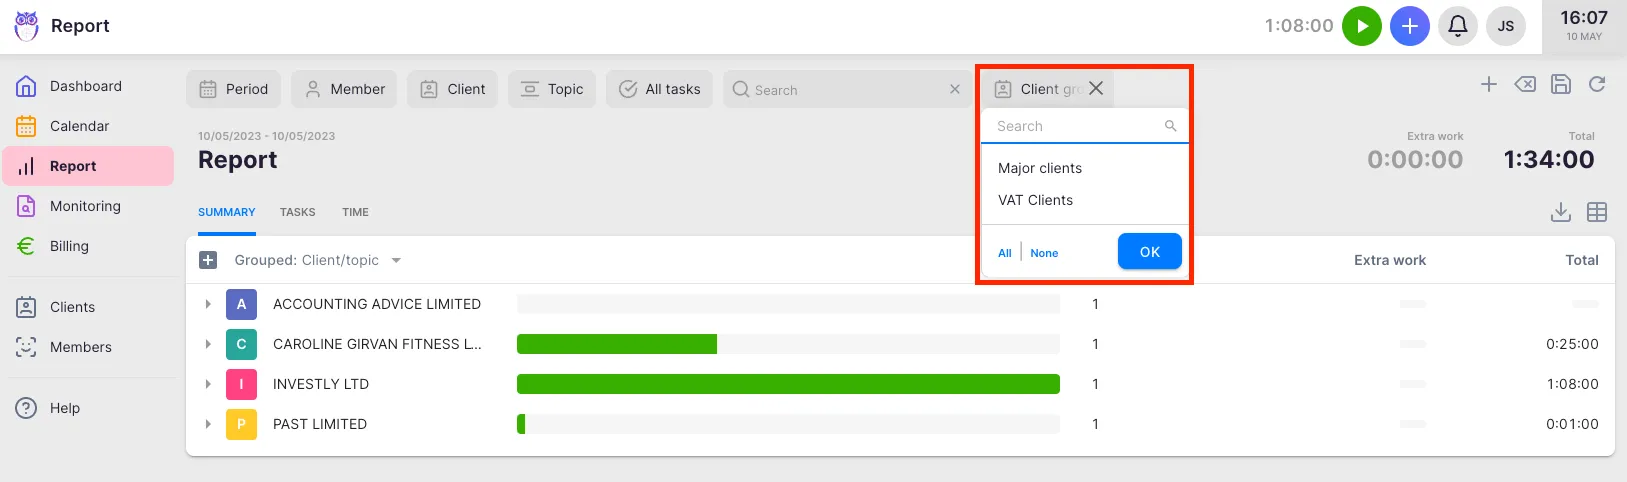
Section titled “Filtering by client group”Client groups work as a filter across major views in Uku:
- Client list — show only clients belonging to selected groups.
- Invoice list — narrow invoices to those associated with clients in specific groups.
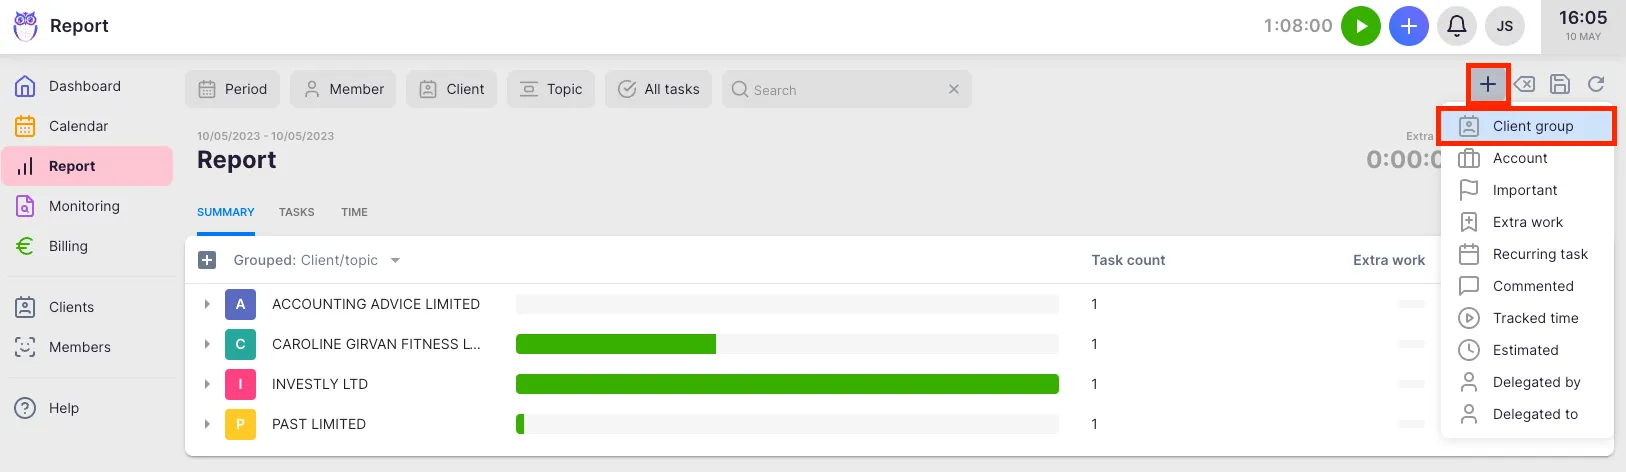
- Reports — slice report data by group to compare performance, revenue, or hours across segments.
- BI Analytics — use the group filter in BI dashboards to analyze metrics for client segments.
- Monitoring — focus on compliance deadlines for a subset of clients.
- Billing tools — limit batch billing runs to clients in specific groups.
The client group filter supports multi-select in all views — select one or more groups to include. Selected filters are reflected in the URL so you can bookmark or share filtered views with colleagues.
Parent company setup
Section titled “Parent company setup”Parent company configuration is set at the contract level and determines where invoices go when a client is a subsidiary of a larger organisation:
- Open the client’s Contract settings (from the client view → Financials → Contract settings).
- Set Invoice to parent company to Yes.
- When enabled, invoices generated for work on the subsidiary are billed to the parent company instead.
The related Bill children option works in the opposite direction — it tells Uku to include subsidiary work on the parent’s invoice. Both settings appear in the invoice configuration summary.
- Naming convention — use clear, consistent names. Groups sort alphabetically, so prefixing with a category (e.g., “Region: EU”, “Tier: Enterprise”) keeps related groups together.
- Multiple groups per client — clients can belong to several groups simultaneously. Use this for cross-cutting concerns — a client can be both “Enterprise” and “EU” at once.
- Archive vs delete — if a group is in use, archiving preserves historical data while removing it from active selectors. You can restore it at any time.
- URL sharing — filtered views (including group filters) are reflected in the URL. Share the link with a colleague to give them the same filtered view.
Troubleshooting
Section titled “Troubleshooting”The client group field is not visible in the client edit form
Section titled “The client group field is not visible in the client edit form”Client groups appear automatically on the client edit form once at least one group has been created in Settings & Apps → Client App → Client groups. Create your first group there and the field will appear on all client records.
I deleted a client group and now old data shows no group
Section titled “I deleted a client group and now old data shows no group”Deleted groups are removed from existing client records. If you want to remove a group from selectors without losing historical associations on reports, use Archive instead of Delete. To restore a deleted group, it must be recreated — deletion is permanent.
A client group is not appearing in the invoice list filter
Section titled “A client group is not appearing in the invoice list filter”The invoice list group filter shows groups that are currently assigned to at least one client with invoices. If a group is new or its clients have no invoices yet, it may not appear as a filter option immediately. Add an invoice to a client in that group to make the filter active.